1. How to open kernel configuration file
1cd kernel
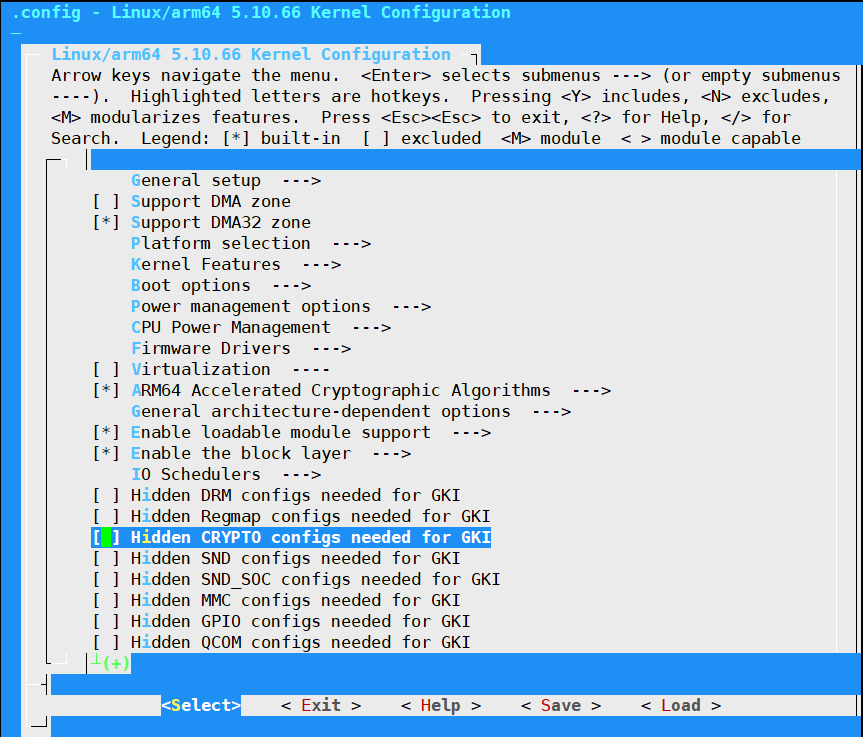
2make ARCH=arm64 menuconfig
The configuration content is saved in kernel/.config generally. If the save directory is not modified, you need to manually update the latest configuration content to kernel/arch/arm64/configs/rockchip_defconfig, and then compile the kernel again.
Note
Some SDK have multiple kernel directories, eg.
kernel, kernel-4.19, kernel-5.10. You need to know which kernel directory is used according to kernel compilation instructions.The configuration file
rockchip_defconfigused by default may be different in different systemsigs, and according to the kernel compilation directives, you can know which configuration file is used in thekernel/arch/arm64/configs/directory.
2. How to flash Firmware in Linux
upgrade_tool is a firmware upgrade tool for Linux. Flash image requires superuser privileges.
Download and execute upgrade_tool first.
Put the firmware files and upgrade_tool in the same directory.
Connect the USB OTG port from the board to your PC, press the recovery button from your board, and connect the power, wait a few seconds and release the button.
Use the commands to flash image.
Basic Commands
 //List devices
upgrade_tool ld

//Download boot
upgrade_tool db rkxxloader.bin

//Flash the partition table
upgrade_tool di -p parameter.txt

//Flash single partition image
upgrade_tool di -k kernel.img

//Falsh multiple partition images
upgrade_tool di -u uboot.img -b boot.img

//Flash the partition image with no defined abbreviation, you need to specify the partition name.
//Take the vendor partition as an example
upgrade_tool di -vendor vendor.img

//When ab partition are used, it also needs to be handled in undefined cases.
//Take boot_a and boot_b as example
upgrade_tool di -boot_a boot.img -boot_b boot.img

//Flash loader and reset
upgrade_tool ul rkxxloader.bin

//Upgrade firmware and reset
upgrade_tool uf update.img

//Erase device
upgrade_tool ef rkxxloader.bin
3. RGA_MMU unsupported Memory larger than 4G
Camera does not work properly on board with more than 4GB of memory (Android OS). After the memory is upgraded from 4GB to 8GB, open the camera APP, the terminal will output:
[  100.488782] rga_mm: RGA_MMU unsupported Memory larger than 4G!
[  100.488814] rga_mm: scheduler core[4] unsupported mm_flag[0x0]!
[  100.488821] rga_mm: rga_mm_map_buffer map dma_buf error!
[  100.488826] rga_mm: job buffer map failed!
[  100.488831] rga_mm: dst channel map job buffer failed!
[  100.488834] rga_mm: failed to map buffer
[  100.488842] rga_job: rga_job_commit: failed to map job info
[  100.488896] rga_job: request[1] task[0] job_commit failed.
[  100.488909] rga_job: rga request commit failed!
[  100.488915] rga: request[1] submit failed!
Solution: Modify the source code according to the file ddr_than-4G.patch and compile it again.